High-Quality Instagram Reels
How to Upload High-Quality Instagram Reels is something most creators get wrong.
If your Instagram Reels look blurred, cropped, or low quality, the problem isn’t the algorithm—it’s how you’re uploading them. Most people ruin their Reel quality before they even hit “Post.” Let’s fix that.
1. Use the Right Instagram Reel Dimensions

✅ Correct Reel Resolution
- 1080 × 1920 pixels
- Aspect Ratio: 9:16
❌ Wrong Sizes (Avoid These)
- Square videos (1080 × 1080)
- Landscape videos (1920 × 1080)
Image Example:
Good: Full-screen vertical video filling the entire phone screen
Bad: Video with black bars on top & bottom or sides
👉 If your Reel doesn’t fill the screen, Instagram treats it as low priority.
2. Keep Text Inside the Safe Zone
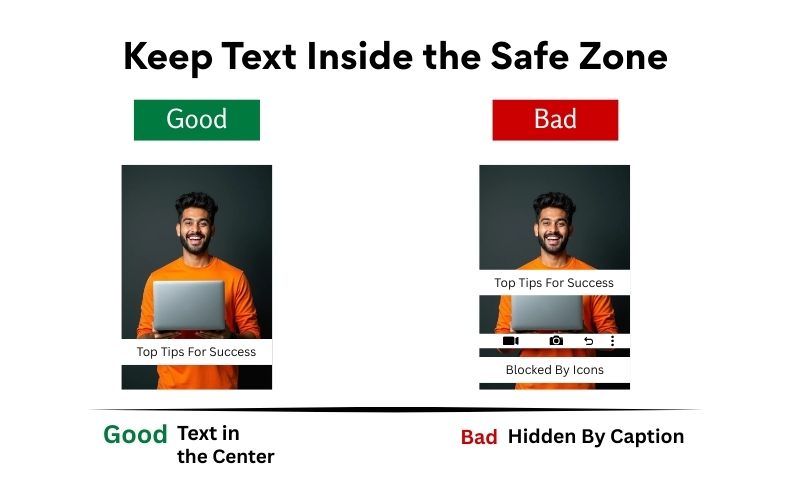
Safe Zone Rule
- Keep text and faces centered
- Avoid top 15% and bottom 20% of the screen
Image Example:
Good: Text placed in the center, clearly visible
Bad: Text hidden behind the caption or Reel icons
👉 If viewers can’t read your text instantly, they scroll.
3. Record Your Video in High Resolution (Not Screen Recording)
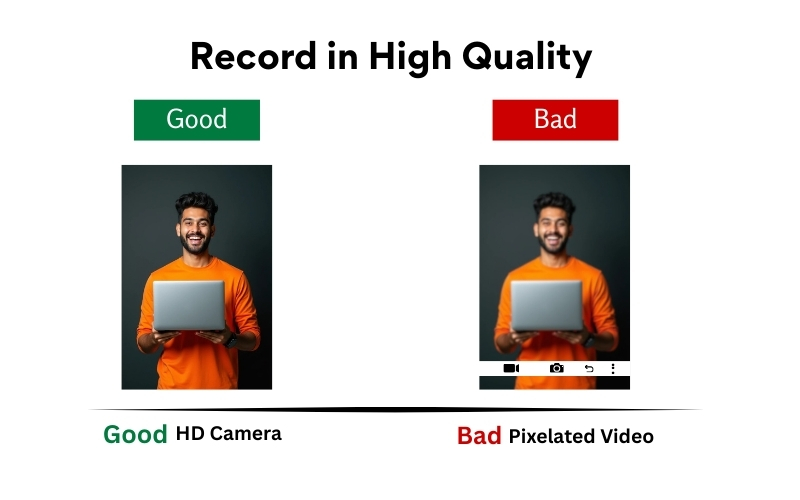
- Camera: Mobile rear camera (or DSLR)
- Resolution: 1080p or higher
- Frame rate: 30fps
Avoid:
- Screen recording videos
- Downloaded WhatsApp videos
- Re-uploaded TikTok videos with watermark
Image Example:
Good: Sharp face, clear background
Bad: Pixelated face, noisy background
👉 Instagram compresses videos. Starting with poor quality guarantees disaster.
4. Export Settings Matter (Most People Ignore This)

Best Export Settings
- Format: MP4
- Codec: 264
- Resolution: 1080 × 1920
- Bitrate: High (8–12 Mbps recommended)
Image Example:
Good: Crisp video after upload
Bad: Blurry video after upload despite good recording
👉 If you export wrongly, Instagram won’t fix it for you.
5. Turn ON “Upload at Highest Quality” (Seriously)
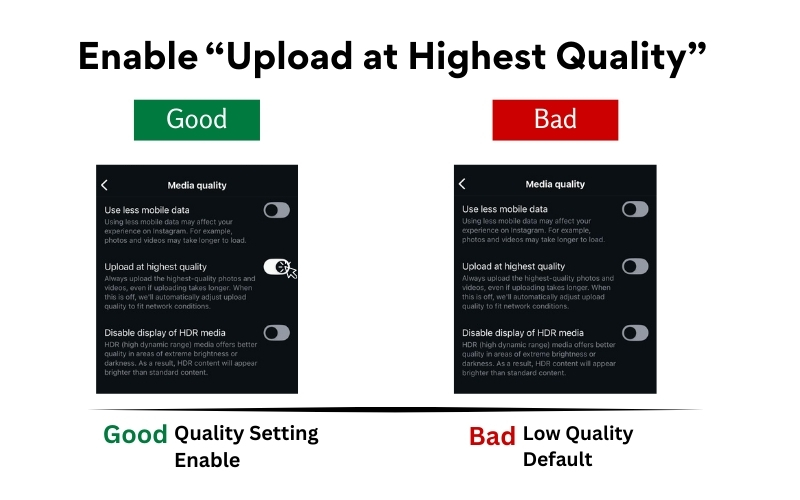
Instagram reduces quality by default.
How to Enable:
- Settings → Account → Data Usage
- Turn ON Upload at Highest Quality
Image Example:
Good: Sharp Reel even after posting
Bad: Clear in gallery, blurry on Instagram
👉 This single setting alone improves quality noticeably.
6. Don’t Upload From Poor Internet
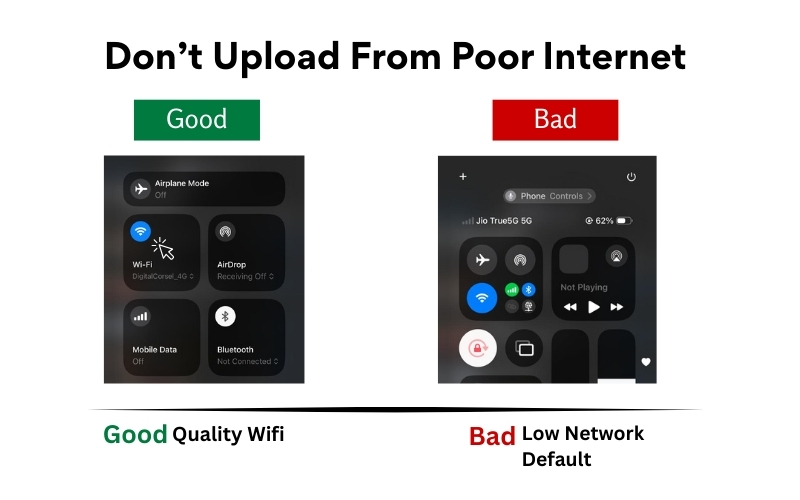
Best Practice:
- Upload using Wi-Fi
- Avoid background downloads
- Don’t switch apps during upload
👉 If your upload struggles, Instagram crushes the file.
7. Avoid Overusing Filters & Stickers
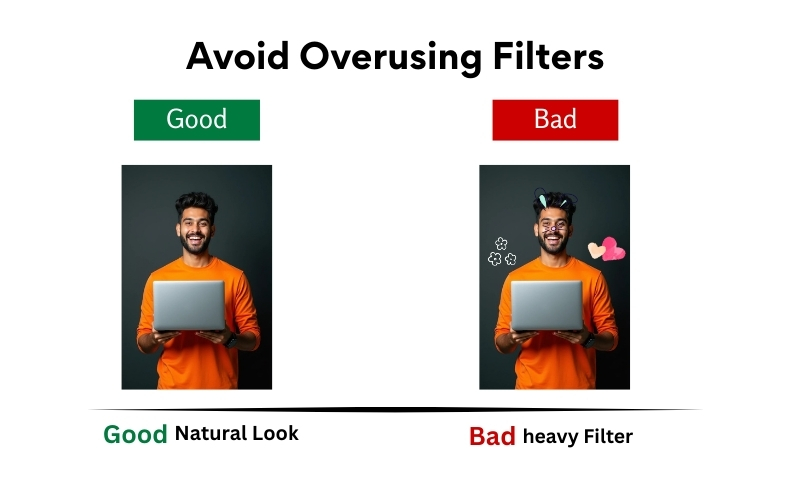
Use:
- Light color correction
- Minimal text
- Clean fonts
Avoid:
- Heavy beauty filters
- Excessive stickers
- Too many text layers
Image Example:
Good: Clean, readable, professional Reel
Bad: Over-edited, cartoonish Reel
👉 Clean content looks premium. Premium content gets shared.
8. Final Quality Checklist (Before Posting)
Ask yourself:
- Is it 9:16?
- Is text inside the safe zone?
- Is the video sharp in preview?
- Is watermark removed?
- Is “Upload High Quality” ON?
If the answer is “no” to any — don’t post yet.
High-quality Reels don’t go viral by luck.
They go viral because they:
- Look professional
- Feel native to Instagram
- Respect the platform’s rules
Most creators fail because they rush posting instead of fixing basics.
Want to master Instagram Reels, content strategy, and real-world digital marketing skills?
At National Institute of Digital Marketing (NIDM), we train you with practical, industry-ready strategies—not just theory—so your content performs, converts, and stands out.